I have been busily perfecting some of my favorite allergy friendly crock pot recipes this winter. Expect to find them here soon!
Blog
Fried Dill Potatoes
Looking for a twist on an easy weeknight side dish? I may just have the answer. A fresh twist on my great-grandmother’s dill potatoes rissole, these potatoes have it all- crunchy on the outside, soft and silky on the inside, with just the right amount of dill to make them feel old fashioned and remind you of your childhood. They take a little extra time to cool off after boiling, but if you plan ahead these potatoes are well worth the trouble and pair well with everything from chicken to beef. I hope you enjoy them as much as my family does.

What you’ll need:
- 5 lbs of potatoes, peeled and diced (I prefer to use red potatoes because of their consistency, but any type will do)
- 10 tbsp butter or margarine
- 3.5 tbsp dill
- salt and pepper to taste
What to do:
(1) Peel and chop the potatoes to your desired size. (if you want them to be more like potatoes rissole, get small red potatoes and leave them hole, if you have kids and you don’t want to have to chop them up for them later, make them more like hashbrowns)
(2) Boil the potatoes with a little bit of salt for about 10 min. (you want them to be soft enough to stick a fork in easily, but not so soft that they fall apart like mashed potatoes)
(3) Strain the potatoes and put them in the refrigerator. Let rest until they are completely cool. (this usually takes at least 30 min- it doesn’t matter how long they sit in the refrigerator though, so it is easiest for me to make them in the morning and just leave them in there until diner time)
(4) Once the potatoes are fully cooled, melt 3 tbsp of butter or margarine into each of 2 frying pans. DIvide the potatoes among the 2 pans and fry until all sides are nicely browned and crunchy. (you can do this step in one pan, but I find it takes longer to get them to the consistency I want)
(5) Melt remaining 4 tbsp of butter and mix in the dill. Pour butter mixture over potatoes and toss them until the dill is well distributed and top with salt and pepper to taste. Serve warm.

Fried Dill Potatoes
A fresh twist on my great-grandmother's dill potatoes rissole, these potatoes have it all- crunchy on the outside, soft and silky on the inside, with just the right amount of dill to make them feel old fashioned and remind you of your childhood
Prep Time 45 minutes
Cook Time 20 minutes
Total Time 1 hour 5 minutes
Servings 8 servings
Ingredients
- 5 lbs potatoes peeled and diced (I prefer to use red potatoes because of their consistency, but any type will do)
- 10 tbsp butter or margarine
- 3.5 tbsp dill
- salt and pepper to taste
Instructions
-
(1) Peel and chop the potatoes to your desired size. (if you want them to be more like potatoes rissole, get small red potatoes and leave them hole, if you have kids and you don't want to have to chop them up for them later, make them more like hashbrowns)
-
(2) Boil the potatoes with a little bit of salt for about 10 min. (you want them to be soft enough to stick a fork in easily, but not so soft that they fall apart like mashed potatoes)
-
(3) Strain the potatoes and put them in the refrigerator. Let rest until they are completely cool. (this usually takes at least 30 min- it doesn't matter how long they sit in the refrigerator though, so it is easiest for me to make them in the morning and just leave them in there until diner time)
-
(4) Once the potatoes are fully cooled, melt 3 tbsp of butter or margarine into each of 2 frying pans. DIvide the potatoes among the 2 pans and fry until all sides are nicely browned and crunchy. (you can do this step in one pan, but I find it takes longer to get them to the consistency I want)
-
(5) Melt remaining 4 tbsp of butter and mix in the dill. Pour butter mixture over potatoes and toss them until the dill is well distributed and top with salt and pepper to taste. Serve warm.
Tips for Surviving a Food Allergy Thanksgiving
Ah thanksgiving- the time when your family all gathers together around good food to spend time together over a perfectly set table. Or in reality, when your kids go stir crazy and you send them all outside while you finish dinner. However you spin it, thanksgiving is all about the food, so what do you do when you have so many food allergies your recipes don’t work? Believe it or not, thanksgiving is doable even with allergies with only a few tweaks. The following is my list of helpful tips for making this holiday season the best one yet.
1. Not everyone will be able to eat everything- and that is ok.
Don’t sweat the small stuff. If every single one of your side items isn’t 100% allergy friendly there’s no reason to panic. Just make sure that you have several solid options and your guests will still leave happy and full.
2. Don’t be afraid to try new recipes.
With allergies becoming an ever increasing problem, there are lots of options out there for good recipes that are simple enough to pull off even on a busy day.
For a few of my options, look no further:
Dairy Free Mac and Cheese
Old Fashioned Cracker Dressing
3 Ingredient Glazed Ham
Allergy Friendly Chocolate Cake
the best bread recipe
3. But, don’t throw out your old family favorites.
Grandma’s dressing calls for half and half? Aunt Suzy’s pumpkin pie call for milk? Not sure how to make a pie crust without gluten? Don’t throw the recipes out, just learn to work around them.
Milk: There are many different kinds of milk substitute, and each serves a different purpose for cooking.
Soy: soy milk has a definitive taste to it but is good as an all-purpose.
Almond: almond milk has a nutty after taste, making it perfect for pecan pies and anything glazed with nuts.
Rice: rice milk is very thin, but has very little taste. it is perfect for dishes like macaroni and cheese, but not so great if you are using the milk to thicken something
Hemp: hemp milk is my go-to for almost anything. the taste of it hides well in dishes and generally works the same as cow’s milk.
Dairy Additives: when it comes to half and half and heavy cream, it’s hard to figure out how to work around. There are many substitutes; however, and they work the same in your recipes. For a good place to start click here: dairy substitutes in non allergy friendly recipes
Flour: This one is tricky. By now, if you have food allergies you know that not all gluten free flour is created equal. Pick your favorite brand and substitute it. It can be done, just know that it needs to be double sifted before you use it in anything, and it will take extra time to thicken anything- just give it time.
4. Remember that family is the most important thing.
As you try to navigate cooking, remember that at the end of the day these people are your family, and they will love you no matter what you put on the table. Try these simple tricks to make your recipes work and just have fun!
Happy thanksgiving, yall!!
Old Fashioned Cracker Dressing
This cracker dressing is an allergy friendly version of my grandmother’s recipe. It has all the flavors of the season that you expect, without all of the things you can’t have. The very smell of the dressing cooking in the oven floods my mind of memories of her in the kitchen. A simple old fashioned cracker style dressing that is both crunchy and soft- this recipe has a very special place in my heart, and I hope that it brings you as much warmth to your family as it does to mine.
What you’ll need:
- 8 oz crackers crushed (stone ground wheat hold up really well here)
- 1 cup chopped celery
- 1/2 cup chopped onion
- 2 hard cooked eggs (scrambled egg substitute will work as well but will change the taste slightly)
- 1 tsp pepper
- 4 1/2 tsp melted butter substitute plus enough milk substitute to make 1 cup (mixed together to create half and half)- you want to use 1/4 cup of this mixture in the actual recipe
- 1 tbsp. cornstarch
- 1 cups chicken broth
What to do:
- Preheat oven to 300F
- In a large bowl combine crackers, celery, onion, eggs, and pepper. set aside in a 9×13 baking dish
- put half and half substitute into a cup and stir in cornstarch
- In a medium pot, bring chicken broth to boil and stir in 1/2 and 1/2 mixture. simmer until thickened (it will still be somewhat thin)
- Pour hot gravy over cracker mixture
- Cook in oven until desired consistency (cooking time varies based on how crunchy you want your dressing, but averages 20 minutes for me)
I have a video tutorial for this recipe on my facebook and twitter sites. Feel free to check it out.
Tex Mex Beef Empanadas
Ok yall, so I know that I am super late posting these, but life has gotten in the way a little bit over the last month. I am back and better than ever with some fun and different recipes for the fall weather. As we get closer to thanksgiving, be sure to check back for some of my old family recipes revamped to match dietary restrictions. A little preview of my granny’s cracker dressing is even up on twitter and facebook, so head over there if you are already in the festive state of mind.
Tex-Mex style Beef Empanadas
These empanadas are not your typical Argentinian empanadas by any means. They are more of a mashup of a taco and empanada rolled into one (artificial) cheesy pocket of dough, but when you combine them with rice and beans they make a quick school night dinner that even the pickiest eaters will enjoy. There are quite a few steps and the first time that I made them they took a little while to make, but once you get the hang of it, they are quick and easy, and can even be made ahead of time and thrown in the oven. I had no leftovers left, but this easily fed my family of 7.
What you’ll need:
For the empanada:
· 2 cups warm (room temperature) water
· 8 tablespoons of butter substitute (lard works here as well), melted
· 1.5 tsp salt
· 6 cups of gluten free 1:1 flour (plus some on standby if the dough becomes too sticky)
· 4 tbsp butter substitute for brushing on after filling
For the filling:
· 1 pound of hamburger (any ratio works great, the leaner the meat the more it will absorb the flavor)
· 3 tbsp butter substitute
· 1 tsp salt
· 1 tsp pepper
· 1 medium white onion, finely diced
· ½- ¾ pound of potatoes, peeled and finely diced (think hashbrowns)
· 2 tbsp minced garlic
· 2 tsp Italian seasoning
· 1 tbsp paprika
· 1 tsp cayenne pepper
· 2 hard boiled eggs (optional, omit where allergies don’t permit the use)
· 1 tbsp tomato paste (optional, omit where allergies don’t permit the use)
· 1 cup chicken broth or water
· 2 cups cheese substitute (cheddar, monterrey jack, etc.)
· Water to seal edges
What to do:
For the empanada dough:
(1) Put the water, butter substitute, and salt into a mixing bowl and stir.
(2) Stir in the flour until a dough forms. Add flour if needed to get a smooth consistency and refrigerate for at least one hour

For the Filling:
(1) In a large frying pan or wok, melt butter substitute.
(2) Add beef, salt and pepper and allow to brown.
(3) Turn the heat down to a medium low and add in the onion, cooking until the onion has browned.
(4) Add in potatoes, garlic, and Italian seasoning and cook for about 5 minutes, or until well incorporated
(5) Stir in the tomato paste and chicken broth and allow to simmer for 10 minutes (you want to give the potatoes time to soften and the broth to form a slight sauce)
(6) Add in hard boiled eggs and cheese and refrigerate until ready to use.

To combine:
(1) Pick up a golf ball sized blob of the empanada dough and form them into balls.
(2) Flatten the balls until they make a circle
(3) Add 2 spoonfulls of filling to the dough and moisten the edges around it with water.
(4) Wrap the dough around the filling to make it fully enclosed.
(5) Pinch the edges with a fork or your fingers.
(6) Brush the tops of the empanadas with a little bit of butter substitute and put them on a baking sheet (use foil if you want to cut down on the clean up- these tend to get a little messy in the oven)

(7) Bake in a 400F oven for 30 min, turning once. Or for a crispier crust- deep fry in any cooking oil for 3 minutes per side.
***if you are looking for a crispier alternative, frying these also works well, just be sure to refrigerate them for at least an hour after crimping the edges to ensure that the filling stays in the actual empanada as you are frying.
Tex Mex Empanadas
tex mex style filling inside a traditional empanada dough with allergy friendly components
Servings 7 people
Ingredients
Empanada Dough
- 2 cups room temperature water
- 8 tbsp butter substitute melted
- 1.5 tsp salt
- 6 cups gluten free 1:1 flour plus extra for rolling out dough
- 4 tbsp butter substitute set aside to brush tops
Filling
- 1 lb hamburger
- 3 tbsp butter substitute
- 1 tsp salt
- 2 tsp pepper
- 1 medium white onion finely chopped
- 3/4 lb potatoes peeled and finely diced
- 2 tbsp minced garlic
- 2 tsp italian seasoning
- 1 tbsp paprika
- 1 tsp cayenne pepper
- 2 hard boiled eggs optional, omit where allergies don't permit
- 1 tbsp tomato paste optional, omit where allergies don't permit use
- 1 cup chicken broth water may be substituted
- 2 cups cheese substitute cheddary, monterrey jack, etc
- water to seal edges
Instructions
Dough:
-
put the water, butter substitute, and salt into a mixing bowl and stir.
-
stir in the flour until a dough forms. add flour if needed to get a smooth consistency. refrigerate for at least one hour.
Filling:
-
in a large frying pan or wok, melt butter substitute.
-
add beef, salt and pepper and allow to brown.
-
turn the heat down to a medium low and add in the onion, cooking until the onion has browned
-
add in potatoes, garlic, and Italian seasoning and cook for 5 minutes
-
stir in the tomato paste and chicken broth and allow to simmer for 10 minutes (allow the potatoes time to soften and the broth to form a sauce)
-
add in hard boiled eggs and cheese and refrigerate until ready to use.
To Combine:
-
pick up a golf ball sized amount of the empanada dough and form them into balls
-
flatten the balls until they make a circle
-
add 2 spoonfuls of the filling to the center of the dough and moisten the edges around it with water
-
wrap the dough around the filling to make it fully enclosed.
-
pinch the edges with a fork or your fingers.
-
brush the tops of the empanadas with a little bit of butter substitute and put them on a baking sheet
-
bake in a 400F oven for 30 min, turning once.
Coming soon
With school back in session here I am looking forward to sharing new recipes with y’all. Next up: dairy free, gluten free tex-mex style empanadas.

Dairy Free Strawberry Cheesecake Frozen Yogurt (with protein powder)
When it comes to allergy free eating, trying to get all of the nutrients we need into a diet is difficult to say the least. Recently, we began to phase in protein powder. While it is great in theory- packs a whole lot of good things in one tiny punch- the reality is that the after taste was way too much for my family. That is when I began to experiment. I started with the traditional shakes and drinks, but what came from it is much more exciting! Quick, easy, and only 4 ingredients- this strawberry cheesecake yogurt is nothing short of summer perfection.

What you’ll need:
- 2 cups frozen strawberries
- 1 cup unsweetened rice milk
- 2 scoops vanilla protein powder
- 2 small allergy friendly cookies (think ginger snaps, Carob Chip Cookies, or vanilla crisps)
- a blender
Process:
(1) Combine all ingredients into blender.
(2) Blend until smooth.
that’s it yall!! homemade frozen yogurt in less than 5 minutes packed full of nutrients.

5 Minute Strawberry Cheesecake Frozen Yogurt (Dairy Free)
this frozen yogurt packs a punch with protein powder mixed in.
Prep Time 2 minutes
Cook Time 3 minutes
Total Time 5 minutes
Servings 4 bowls
Calories 160 kcal
Ingredients
- 2 cups frozen strawberries
- 1 cup unsweetened rice milk
- 2 scoops vanilla protein powder
- 2 small cookies
Instructions
-
combine all ingredients in a blender
-
blend until smooth
Allergy Friendly Boston Cream Pie (Dairy free, gluten free)
This Boston Cream pie recipe took a lot to put together. How do you make a creamy rich whipped cream based cake without milk, anyway? After multiple failed attempts (and messy kids attempting to eat them anyway), I have come up with this one. It utilizes coconut cream as well as unsweetened rice milk. I put it to the test with my family, and not a one of them could tell it was dairy free. I hope you enjoy this one as much as we did!!


Allergy Friendly Boston Cream Pie (Dairy Free, Gluten Free)
this dairy free boston cream pie has all of the flavor that you would expect from milk, without any of the allergies
Prep Time 45 minutes
Cook Time 20 minutes
Total Time 1 hour 5 minutes
Servings 2 cakes
Calories 1600 kcal
Ingredients
pudding
- 3 tbsp cornstarch
- 2 tbsp water
- 1 1/2 cups unsweetened rice mi lk
- 1/2 tsp vanilla extract
- 1/4 cup sugar
whipped cream
- 1 can coconut cream
- 3/4 cup powdered sugar
- 1/4 tsp vanilla extract
yellow cake
- 8 tbsp butter substitute
- 1 1/2 cups sugar
- 8 eggs worth of egg substitute reconstituted
- 3/4 cups unsweetened rice milk
- 1 1/2 tsp vanilla extract
- 2 cups gluten free flour well sifted
- 1/2 tsp salt
- 2 tsp baking powder
chocolate topping
- 2 tbsp unsweetened rice milk
- 2 oz unsweetened chocolate
- 2 tbsp butter substitute
- 1 1/2 cup powdered sugar
Instructions
Make pudding
-
combine water and cornstarch. set aside
-
in a saucepan over medium high heat, stir all of the ingredients together until desired thickness is achieved. put in refrigerator.
make whipped cream
-
pull out just the cream from the top of the can of coconut cream
-
whip with a stand mixer and add in the powdered sugar and vanilla extract
-
set aside in refrigerator
make the yellow cake
-
mix together the flour substitute, baking powder, and salt
-
in a stand mixer, cream together butter and sugar. add in eggs a little at a time. add in vanilla
-
add in 1/2 unsweetened rice milk and 1/2 flour mixture. mix well. then add the other half of the unsweetened rice milk and flour mixture. mix well.
-
pour into 2 greased round pans
-
bake in a 350F oven for 20 min
stacking the cakes
-
once they have cooled, cut cakes into halves. set aside.
-
combine whipped cream and pudding together.
-
using a spatula, put whipped cream/pudding mixture on top of the 2 bottom layers of cake. stack the top layer on top of them
make the chocolate topping
-
melt 1 tbsp butter substitute, and 1 oz baking chocolate together.
-
mix in rice milk and powdered sugar
-
pour over top of one cake
-
repeat for the second cake.
Recipe Notes
this recipe is a lot of work and definitely not one to do when you need a quick cake, but the result is so worth it for birthdays or special occasions.
What you’ll need:
for the pudding:
- 2 tbsp water
- 3 tbsp cornstarch
- 1 1/2 cups unsweetened rice milk
- 1/2 tsp vanilla extract
- 1/4 cup sugar
for the whipped cream:
- 1 can coconut cream
- 3/4 cup powdered sugar
- 1/4 tsp vanilla extract
for the yellow cake: (adapted from all recipes)
- 16 tbsp butter substitute
- 1 1/2 cups sugar
- 8 eggs worth of egg substitute
- 3/4 cup unsweetened rice milk
- 1 1/2 tsp vanilla extract
- 2 cups gluten free flour (sifted well)
- 2 tsp baking powder
- 1/2 tsp salt
for the chocolate topping: (adapted from kraft)
- 2 tbsp unsweetened rice milk
- 2 oz unsweetened chocolate
- 2 tbsp butter substitute
- 1 1/2 cup powdered sugar
Instructions:

- Make the pudding.
- combine water and cornstarch
- using a saucepan on medium high heat, combing unsweetened rice milk, vanilla extract, sugar, and cornstarch/water
- whisk together until desired thickness, and put aside in fridge

- Make the whipped cream.
- pull out just the cream from the top of the can of coconut cream
- whip with a stand mixer and add powdered sugar and vanilla
- set aside in the refrigerator

- Make the Cake.
- mix together flour, baking powder, and salt
- cream the butter substitute and sugar
- add in egg substitute a little at a time (making sure to reconstitute first if using the powdered kind)
- add in vanilla
- add in 1/2 the rice milk and 1/2 of the flour substitute. mix together
- add in the other 1/2 of the rice milk and 1/2 of the flour substitute. mix together
- pour into 2 greased round pans
- cook in a 350F oven for 20 min.
- let cool
- Mix together the pudding and whipped cream and set aside in the refrigerator.
- cut the yellow cake in half and prepare to stack.
- divide the pudding/whipped cream into 2 and use as a filling in between the 2 layers of cake. repeat with other cake. set in refrigerator to harden.
- make the chocolate topping
- melt 1 oz chocolate and 1 tbsp butter substitute
- mix in 1 tbsp unsweetened rice milk and 3/4 cup powdered sugar
- repeat for second cake
- pour chocolate topping over stacked cake.
Enjoy.
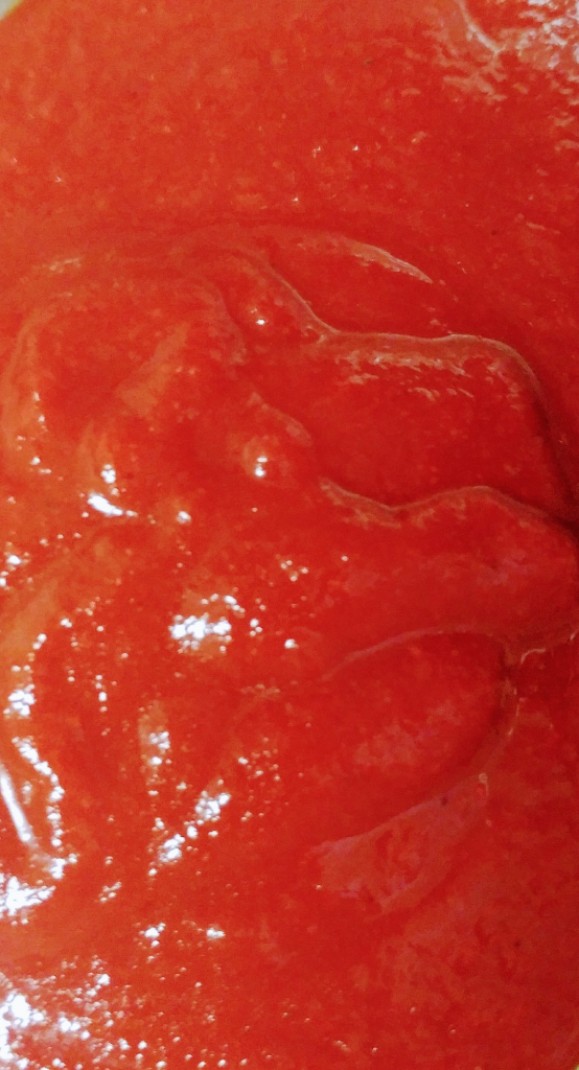
Tomato Free “Ketchup”
Ketchup is one of those condiments that might as well be its own food group for my kids. I can only assume it is like that for most. But what do you do when you can’t have tomatoes? A world without ketchup simply isn’t an option for my family, so after months of tinkering I have come up with a recipe that will fool even my 4 year old when served with his favorite French fries. With a base of carrots and apples, you will be shocked at just how close to ketchup this recipe really becomes.
What you’ll need:
- 12 oz organic baby food carrots
- 12 oz organic baby food apples
- 1 tbs salt
- 1 tbs garlic powder
- 1 tbs chili powder
- 3 1/4 tsp onion powder
- 7 tsp distilled white vinegar
- 5 tsp Worcestershire sauce
- 1 tsp red food coloring (optional- but this recipe is one of those psychological things- if it looks like ketchup it will taste like it)
Process:
Whisk all items together until smooth.

Tomato Free "Ketchup"
all of the ketchup flavor, none of the tomatoes. allergy friendly
Prep Time 5 minutes
Total Time 5 minutes
Servings 30 oz
Calories 310 kcal
Ingredients
- 12 oz organic baby food carrots
- 12 oz organic baby food apples
- 1 tbsp salt
- 1 tbsp chili powder
- 1 tbsp garlic powder
- 3 1/4 tsp onion powder
- 7 tsp distilled white vinegar
- 5 tsp worcestershire sauce
- 1 tsp red food coloring
Instructions
-
whisk all items together until smooth
Recipe Notes
the red food coloring in this recipe is optional, however if using for kids, it is highly recommended that you use it. if it looks like ketchup, it will taste like ketchup
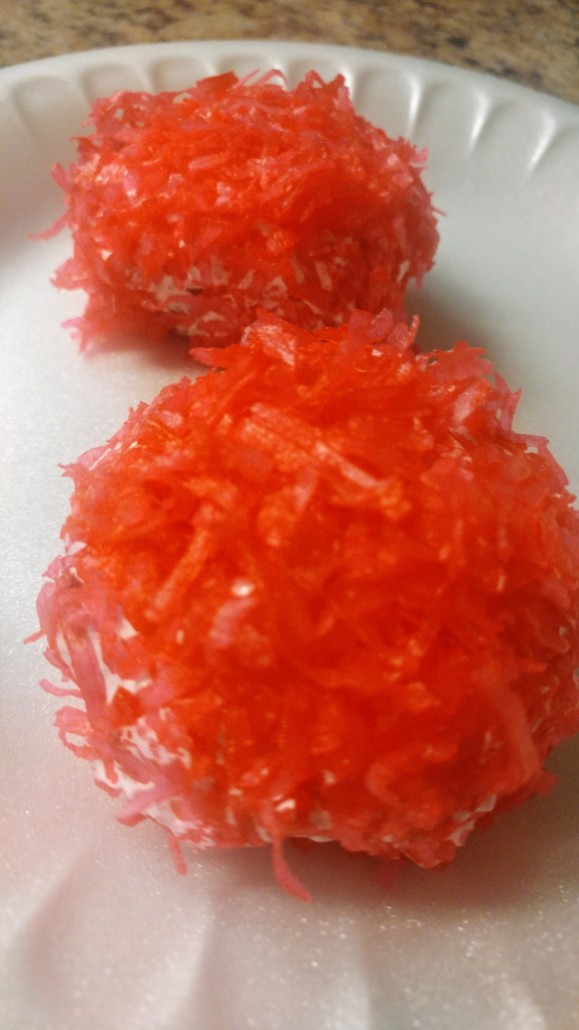
Allergy Friendly Snowball Cupcakes (Gluten and Dairy Free)
These cupcakes are so good! It has several steps and seems like a lot, but if you are looking for a little bit of a fancy dessert- this is it! They invoke all of the memories of childhood opening a fresh package of snowballs without the guilt of eating a bunch of things that upset your allergies.
What you’ll need:
- 8 tbs butter substitute
- 2 cups sugar
- 3 eggs worth of egg substitute
- 1 tsp vanilla extract
- 2 cups gluten free baking flour
- 2 tsp baking soda
- 3/4 tsp salt
- 1/3 cup cocoa powder
- 1 1/2 cups unsweetened rice milk
- 2 tablespoons gelatin
- 1 cup water
- 2 cups of sugar
- ½ cup powdered sugar
- ¼ tsp salt
- 1 tsp vanilla extract
- 4 cups of sweetened shredded coconut
- Food coloring (optional)
Process:
(1) Using a stand mixer or hand mixer cream together butter substitute and sugar
(2) add in egg substitute and vanilla extract.
(3) in a separate bowl, mix together flour substitute, baking soda, salt, and cocoa powder.
(4) with mixer running, add half of the flour mixture to the creamed butter.
(5) add in unsweetened rice milk.
(6) add in the other half of the flour mixture.
(7) beat until well blended.
(8) spoon into cupcake pan and cook in a 350 degree oven for 15 minutes.
(9) Hollow out a cone in the middle of the cupcakes with a knife once cool.
(10) Mix gelatin into ½ cup cold water and set aside until it gels
(11) Dissolve sugar into ½ cup of water
(12) Add in gelatin and bring to a boil.
(13) Once it is almost boiling over the pan, transfer it to a stand mixer.
(14) Stir in salt and vanilla
(15) Stir in mixer on low until it is combined and then stir on high until it is the consistency of marshmallow fluff
(16) Put half of the marshmallow fluff into a piping bag and pipe into the hollowed out cone in the middle of the cupcakes.
(17) Optional: dye the coconut shreds desired color
(18) Using your hands, cover the cupcake with marshmallow fluff.
(19) Dip in coconut
Enjoy!!
to view the recipe video for this dish, click here:

Gluten Free Dairy Free Snowball Cupcakes
these have all the same tastes that you remember from childhood without the dairy or gluten to make you sick
Prep Time 40 minutes
Cook Time 20 minutes
Total Time 1 hour
Servings 24 cupcakes
Calories 146 kcal
Ingredients
- 8 tbsp butter substitute
- 2 cups sugar
- 3 eggs worth of egg substitute reconstitute first if using powder
- 1 tsp vanilla extract
- 2 cups gluten free baking flour
- 2 tsp baking soda
- 3/4 tsp salt
- 1/3 cup cocoa powder
- 1 1/2 cups unsweetened rice milk
- 2 tbsp gelatin
- 1 cup water
- 2 cups sugar
- 1/2 cup powdered sugar
- 1/4 tsp salt
- 1 tsp vanilla extract
- 4 cups sweetened shredded coconut
- pink food coloring optional
Instructions
-
Using a stand mixer or hand mixer cream together butter substitute and sugar
-
add in egg substitute and vanilla extract
-
in a separate bowl, mix together flour substitute, baking soda, salt, and cocoa powder
-
with mixer running, add half of the flour mixture to the creamed butter
-
add in unsweetened rice milk
-
add in the other half of the flour mixture
-
beat until well blended
-
spoon into cupcake pan and cook in a 350F oven for 15 minutes
-
hollow out a cone in the middle of the cupcakes with a knife once cool
-
mix gelatin into 1/2 cup cold water and set aside until it gels
-
dissolve sugar into 1/2 cup of water
-
add in gelatin and bring to a boil
-
once it is almost boiling over the pan, transfer it to a stand mixer
-
stir in salt and vanilla
-
stir in mixer on low until it is combined and then stir on high until it is the consistency of marshmallow fluff
-
put half of the marshmallow fluff into a piping bag and pipe into the hollowed out cone in the middle of the cupcakes
-
optional: dye the coconut shreds desired color
-
using your hands, cover the cupcake with marshmallow fluff
-
dip in coconut