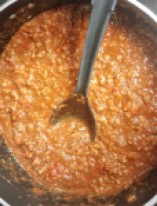
Previously, I have talked about my meat sauce that I use in just about anything Italian based. In this particular recipe, it is mixed with rice and stuffed into peppers before being baked. This really doesn’t take long to make, and is a good way to use any leftover sauce from another recipe.
What you’ll need:
1/2 batch of meat sauce- find the recipe here: Italian Meat Sauce
6 servings of rice
12 green bell peppers, hollowed out
enough cheese substitute to garnish each pepper (around 2 cups)
Process:
(1) Preheat oven to 350 degrees.
(2) Simmer meat sauce while you hollow out bell peppers.
(3) Put rice into a bowl and mix in the meat sauce a little at a time until you get the desired consistency.
(4) Stuff equal amounts of rice mixture into bell peppers and garnish with cheese. Place on foil lined pan.
(4) bake for 30 min or until brown on top.
Let cool and enjoy.
As a side note: My three year old is obsessed with Halloween- dressing up and trick-or-treating is his favorite thing in the world. Because of this, we go all out on dinner during the month of October (and random times throughout the year as well). If you are looking for something a little more fun and kid friendly to do with these, try swapping out green bell peppers for orange ones and make a jack-o-lantern- you won’t be disappointed.
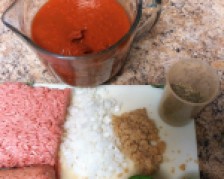
This recipe has tomatoes in it, so if you are allergic to them stay clear. After a lot of trial and error, I have managed to make a meat sauce without too many preservatives that can be used any way you need it to. From pasta to peppers, lasagna to ravioli, this is my ultimate go to in Italian goodness.
What you’ll need:
1 pound Italian sausage
2 pounds ground beef
1 minced white onion
2 cloves garlic
4 cups crushed tomatoes
if you are using canned, a 28 oz can will do fine
12 oz tomato paste
2 cups tomato sauce
if you are using canned, two 6.5 oz cans will do fine
2 tbs sugar
4 tbs Italian seasoning
salt and pepper to taste
Process:
(1) In a large pot, brown sausage, ground beef, onion, and garlic over medium heat.
(2) Stir in all of the tomatoes and sugar.
(3) Season with Italian seasoning, salt, and pepper.
(4) Let simmer on low heat for about 30 min.
(5) Use in any recipe that calls for meat sauce.
This recipe also freezes well. Separate into 2 batches and seal well. To reheat, simply put it in a pot on low heat until it has started to bubble again.
this meat sauce is the perfect substitute for any red sauce in a recipe
Course
sauce
Cuisine
Italian
Prep Time10minutes
Cook Time30minutes
Total Time40minutes
Servings2batches
Calories1400kcal
AuthorAllergenFriendlyFamily.com
Ingredients
1lbitalian sausage
2lbsground beef
1white onionfinely chopped
2clovesgarlicminced
4cupscrushed tomatoes
12oztomato paste
2cupstomato sauce
2tbspsugar
4tbspitalian seasoning
Instructions
in a large pot, brown sausage, ground beef, onion, and garlic over medium heat
stir in all of the tomatoes and sugar
season with Italian seasoning
let simmer on low heat for about 30 min
use in any recipe that calls for meat sauce (lasagna, ravioli, spaghetti, etc)
Recipe Notes
++this recipe freezes extremely well. simply separate into batches and seal well. To reheat, put it back in a pot and allow to heat through on low heat
I know I post a lot of chicken recipes, so I planned on posting one from a different meat category. But, we got one of our roller coaster periods here in Florida where we get all 4 seasons in one week, so I had to pull out this one. This soup is perfectly balanced, soothing, and my ultimate comfort food for cold days and sick days alike; with the best part being the noodles that make you forget that what you are eating is allergy friendly.
Items you’ll need:
around 1 gallon of chicken broth
3-4 boneless, skinless chicken breasts
3 cups 1:1 gluten free flour
1/4 tbsp. salt
3 eggs worth of egg substitute (reconstitute first if using powder)
1/4- 1/2 cup of water (depending on humidity)
1 pound organic carrots, peeled and chopped
6-8 stalks celery (chopped if you like the taste of celery, whole if you are just using it for the taste)
chunky rings of white onion
1 tbs garlic powder
salt and pepper to taste
Process- Night Before:
If you want to save some time, rotisserie chicken works just as well in this recipe. However, I prefer to crock pot cook the chicken the night before to make sure that I know exactly how it was prepared with the allergy restrictions that we have. To use this method, put chicken breasts in the crockpot along with about 1/2 an inch of water, a few tablespoons of butter substitute, salt, pepper, minced garlic, and a few pieces of onion. Put the crockpot on low and let it go overnight. By the next morning the crock pot will have shredded your chicken for you.
Process- Day of:
(1) Simmer chicken broth over low to medium heat. While it is simmering, put in the pieces of chunky onion as well as the celery for flavoring.
(2) Pre boil the carrots in a small saucepan. Drain and set aside.
(3) Mix flour and salt together in a stand mixer using a dough hook
(4) Add egg substitute
(5) Add water to mixture slowly until a dough forms together and holds
(6) Turn over dough onto well floured surface and roll out until they are the thickness that you want (we prefer slightly thick and wide noodles, but they cook the same regardless)
(7) Cut the noodles to desired width and length. (I use an old fashioned pizza cutter to save time here. The noodles aren’t always the prettiest, but what’s the point of making homemade noodles if you can’t tell they are homemade anyway)
(8) If you were using the celery and onion just to flavor, go ahead and take them out now (My kids refuse to eat it if there are green things in it of course, but it tastes just as good with them left in)
(9) Pull the pieces of noodles off the board and put them into the simmering chicken broth. (They should come off fairly easy, and they will separate in the broth as well)
(10) Add the chicken and carrots to the broth.
(11) Simmer until ready to eat. Salt and pepper to taste.
When I first tried to figure out cooking within the parameters that my family’s allergies created, the hardest part was letting go of family recipes that had been passed down through generations. This particular recipe is my grandmother’s, and my mom will tell you the story about my baby shower any time I make it, because it was the first time that she made it for her. I personally can’t begin to count the number of memories I have of my grandmother making this on a Sunday.
What I have come to realize is that once you get comfortable cooking with substituted ingredients, anything can be tweaked to accommodate. This recipe has a little bit more prep work than some that I post, but the end result is a dish that is sure to please and works well for any season.
Items you’ll need:
1 pound gluten free spaghetti (can be store bought, or I have a recipe that I will post a link to)
3 stalks of celery, finely chopped
1 white onion, finely chopped
1 green bell pepper, finely chopped
3 lbs boneless, skinless chicken breasts
2 oz mushrooms, finely chopped (from a can is fine)
4 oz pimentos, finely chopped
3 1/2 cups dairy free cheddar cheese
1 qt chicken broth (reserve from prepared chicken is fine)
4 tbsp. corn starch (gluten free all purpose flour works just as well)
dairy free parmesan cheese to garnish
Process- Night Before:
I know that I have said before how much I believe in making a process as simple as possible. I usually try to crock pot cook the chicken the night before to make it easier, but you can cook it day of as well.
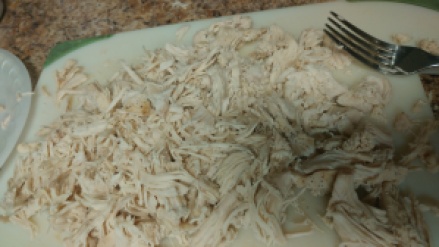
To cook the chicken, put 3 pounds of frozen chicken breasts in the crockpot along with about 1/2 an inch of water, a few tablespoons of butter substitute, salt, pepper, minced garlic, and a few pieces of onion. Put the crockpot on low and let it go overnight. By the next morning, you will have tender, juicy shredded chicken with very little work.
Process- Day of:
(1) Prepare spaghetti.
(2) Preheat oven to 350 degrees.
(3) Put the shredded chicken from the night before in a big mixing bowl.
(4) Saute celery, onion, and green pepper in a little bit of butter substitute and add it to the chicken. Add mushrooms, pimento, spaghetti, and cheese substitute to the chicken as well. Mix.
(5) Stir cornstarch into chicken broth and whisk to remove any clumps. Add to spaghetti mixture.
(6) Pour spaghetti mixture into a greased baking pan. Top with parmesan cheese substitute and bake for 30 minutes.
This recipe tastes best if you give the chicken broth time to soak into the spaghetti, so wait half an hour before you serve it for best results.
**When you reheat leftovers of this make sure you add chicken broth to make it creamy again.
gluten free, dairy free chicken spaghetti with all of the taste of the real thing
Course
Main Course
Cuisine
American
Prep Time15minutes
Cook Time30minutes
Total Time45minutes
Servings12servings
Calories420kcal
AuthorAllergenFriendlyFamily.com
Ingredients
1lbgluten free spaghetti
3stalksceleryfinely chopped
1 white onionfinely chopped
1green bell pepperfinely chopped
3lbsboneless, skinless chicken breasts
2ozmushroomsfinely chopped
4ozpimentosfinely chopped
3 1/2cupsdairy free cheddar cheese
1qtchicken broth
4tbspcorn starch or gluten free all purpose flour
1/4cupdairy free parmesan cheeseto garnish
Instructions
For chicken (rotisserie chicken works here as well if short on time)
put 3 pounds of frozen chicken breasts in a crockpot along with 1/2 inch of water, a few tablespoons of butter substitute, salt, pepper, minced garlic, and a few pieces of onion
put the crockpot on low and let it go overnight. by the next morning, you will have tender, juicy shredded chicken with very little work.
for spaghetti
prepare and drain spaghetti. set aside
preheat oven to 350F
put the shredded chicken from the night before in a big mixing bowl.
saute celery, onion, and green pepper in a little bit of butter substitute or olive oil and add it to the chicken
add mushrooms, pimentos, spaghetti, and cheddar cheese substitute to the chicken
mix well
stir cornstarch into chicken broth and whisk to remove any clumps. add to spaghetti mixture
pour spaghetti mixture into a greased baking pan
top with parmesan cheese substitute and bake for 30 minutes.
Recipe Notes
++this recipe tastes best if you give the chicken broth time to soak into the spaghetti, so wait half an hour before you serve it for best results
+++when you reheat leftovers of this, make sure you add some leftover chicken broth to make it creamy again
So you made a big batch of carob bark and need something to do with it? Chocolate chip cookies without the chocolate is always a favorite in my house. While these usually come out uniform and pretty, my 3 year old insisted in helping on this one. He also refused to let me stir any of the batter, so excuse the roughness of the cookies in the final pictures. Something about the idea of only putting one spoonful of cookie dough at a time on a cookie sheet just seems so plain and ridiculous to him. These cookies are delicious, and they taste exactly how you would expect a chocolate chip cookie to taste- regardless of what they look like.
gluten free. dairy free cookies that melt in your mouth.
Course
Dessert
Cuisine
American
Prep Time10minutes
Cook Time12minutes
Total Time22minutes
Servings12cookies
Calories100kcal
AuthorAllergenFriendlyFamily.com
Ingredients
2cupscarob chips
1 1/4cupgluten free flour
1/2 tspbaking soda
1/2tspsalt
8tbspbutter substitute
1/2cupsugar
1/2cupbrown sugar
1/2tspvanilla extract
1eggworth of egg substitute(reconstitute if using the powdered substitute)
Instructions
preheat oven to 375 degrees
mix flour, salt, and baking soda together and set aside
beat butter, brown sugar, sugar, and vanilla extract together until they are creamy
add the egg, beating it into the butter mixture
slowly mix in the flour mixture until a soft dough forms.
stir in carob chips
place spoonfulls of dough rolled into balls on an UNGREASED cookie sheet.
bake for about 12 minutes or until they are the color of brown that you want them to be
place on a wire rack to cool
Recipe Notes
++if you accidentally grease the cookie sheet, know that these cookies are made with numerous substitutions, so they will all meld together into one giant cookie, but they will still taste the same
Items you’ll need:
2 cups of carob chips
1 1/4 cup gluten free flour
1/2 tsp baking soda
1/2 tsp salt
8 tbs butter substitute
1/2 cup sugar
1/2 cup brown sugar
1/2 tsp vanilla extract
1 egg’s worth of egg substitute (reconstitute powder kind if using)
Process:
(1) preheat oven to 375 degrees
(2) Mix flour, salt, and baking soda together and set aside.
(3) Beat butter, brown sugar, sugar, and vanilla extract together until they are creamy.
(4) Add the egg, beating it into the butter mixture.
(5) Slowly mix in the flour mixture until a soft dough forms.
(6) Stir in carob chips.
(7) Place spoonfulls of dough rolled into balls (or oddly shaped ball like forms in this case) on an UNGREASED cookie sheet. (keep in mind if you grease the pan these will turn into one giant sheet of cookies- which are still good, just not as pretty)
(8) Bake for about 12 minutes or until they are the color of brown that you want them to be.
One of the hardest allergies to work with in this whole process has been my mom’s allergy to chocolate. My kids are dessert driven (aren’t they all) and they love to help bake sweets, but making an entire house smell like freshly baked cookies that not everyone can eat just seems cruel. Enter carob- the magical bitter powder that with the right amount of love and work can fool even my preschooler into thinking he’s eating chocolate.
this carob bark melts in your mouth just like chocolate and will have you forgetting that it is carob in just one bite. it bakes perfectly and can be used as a substitute in any recipe that calls for chocolate chips.
Course
Dessert
Cuisine
American
Prep Time10minutes
Cook Time10minutes
Total Time20minutes
Servings45pieces
Calories62kcal
AuthorAllergenFriendlyFamily.com
Ingredients
1/2cupcoconut oil
1/2 cupalmond butter
1/2 cupsugar
5tbspcarob powder
1/2cuphoney
1tspvanilla
2tbspbutter substitute(optional)
1/4cuprice milk(optional)
Instructions
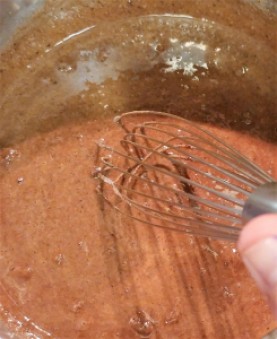
melt coconut oil and almond butter over a slow simmer while constantly whisking (don't let it get to a boiling point)
whisk in carob powder and sugar. combine thoroughly
mix in remaining ingredients. stir until thickened
pour mixture into pan with sides lined with wax paper
place in fridge overnight to harden. (or a couple of hours in the freezer if your kids are like mine and can't wait that long)
break the carob bark into pieces of various sizes- depending on what you plan to use it for
Recipe Notes
++It’s worth noting here that the rice milk and butter substitute are not necessary, these chocolate bars will taste just as good without it. However, if you are looking for them to be the same consistency as chocolate, the addition of butter and milk really helps.
+++Fair Warning: These work great as substitutes for chocolate chips in baking, putting peanut butter in between pieces and making peanut butter cups, or simply eating on their own. They do melt in your hand much quicker than regular semisweet chocolate though, so be warned that you will need to keep wet wipes handy if you intend on eating them as they are.
Items you’ll need:
1/2 cup coconut oil
1/2 cup almond butter
1/2 cup sugar
5 tbsp carob powder
1/2 cup honey
1 tsp vanilla
2 tbs butter substitute (optional)
1/4 cup rice milk (optional)
Process:
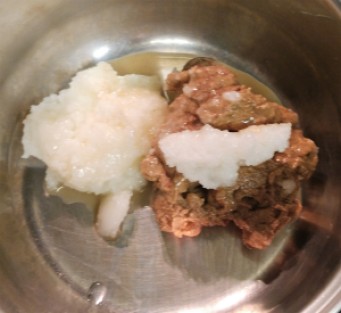
(1) Melt coconut oil and almond butter over a slow simmer while constantly whisking. (Don’t let it get to boiling)
(2) Whisk in carob powder and sugar. Combine thoroughly
(3) Mix in remaining ingredients. Stir until thickened.
* It’s worth noting here that the rice milk and butter substitute are not necessary, these chocolate bars will taste just as good without it. However, if you are looking for them to be the same consistency as chocolate, the addition of butter and milk really helps.
(4) Pour mixture into pan with sides lined with wax paper.
(5) Place in fridge over night to harden. (or a couple of hours in the freezer if your kids are like mine and can’t wait that long)
(6) Break the carob bark into pieces of various sizes- depending on what you plan to use it for.
** Fair Warning: These work great as substitutes for chocolate chips in baking, putting peanut butter in between pieces and making peanut butter cups, or simply eating on their own. They do melt in your hand much quicker than regular semisweet chocolate though, so be warned that you will need to keep wet wipes handy if you intend on eating them as they are.
Meatballs are one of my kids’ favorites. Something about eating a food that looks like you could bounce it down the hallway if you didn’t eat it makes them irresistible. But meatballs to me always meant tomato sauce and noodles, so what do you do when you can’t eat tomatoes? Swedish meatballs, of course.
Items you’ll need:
Mashed Potatoes:
3 lbs potatoes, peeled and chopped
3 tbs butter substitute
1.5 cups rice milk (other milk will work just as well)
(1) Coat a saucepan in oil and add in chopped onions. Cook until brown and crispy.
(2) In a separate bowl, add in half of the bread crumbs, salt, pepper, and egg substitute to the onion.
(3) Once the mixture has cooled off enough that you can work with it, add in the ground beef and mix together until it is fully blended.
(4) Roll the meat mixture into golf ball sized balls and roll in leftover breadcrumbs. Put on pans lined in foil.
(5) Refrigerate.
** Technically, this doesn’t have to be done the night before, it just makes it that much easier for me when I can let my kids help me roll them at night. If you chose to do this part of the process on the same day, just make sure that the meatballs themselves stay in the fridge for at least a couple of hours before you cook them (otherwise they will fall apart).
Process- Day of:
(1) Boil potatoes in a large pot of water with some salt mixed in until tender. Drain and set aside.
(2) In a small saucepan, heat butter substitute and rice milk over low heat until the butter has melted.
(3) In a stand mixer, mix together potatoes and hot milk and butter substitute.
(4) Mix until super fluffy, salt and pepper to taste. Set Aside.
(5) Bring beef broth and water to a slow simmer on medium heat.
(6) Drop in meatballs and simmer until cooked through.
(7) Take out meatballs and reserve 3 cups of beef broth.
(8) Melt butter substitute and whisk in flour.
(9) whisk in beef broth. let it thicken up into a gravy.
(10) Mix meatballs into the gravy and evenly coat.
Nothing tastes better than a nice home cooked breakfast on a stressful morning- but who really has time (or patience) on a hard morning to even think about it. That’s where these cinnamon rolls come in. If you know that it’s gonna be one of those days (standardized test days for the win), and you can take a minute to get these rolled out the night before; all it takes is a warm oven and half an hour the next day to get your day started out right. Ooey, gooey, and fresh from the oven- these rolls are enough to get even the most grumpy of over-sleepers to the table.
These overnight cinnamon rolls are perfect for busy mornings. If you have a little bit of time the night before, you can easily stick these in the oven the next morning and forget about them until they are warm and gooey.
Course
Breakfast
Cuisine
American
Prep Time20minutes
Cook Time1hour30minutes
Total Time1hour50minutes
Servings18rolls
Calories150kcal
AuthorAllergenFriendlyFamily.com
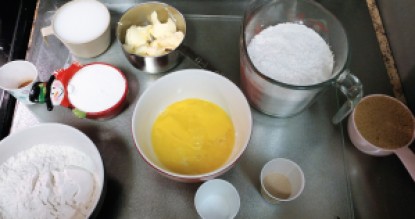
Ingredients
For Cinnamon Rolls
4cupsgluten free flour
1/2cupsugar
2 1/4tspyeast
1cupunsweetened rice milk
1tspsalt
3eggs worthegg substitutereconstitute first if using powder
1cupbrown sugar
1 tbspcinnamon
1tbspnutmeg(optional)
melted butter substituteenough to cover dough
Optional Icing
1cuppowdered sugarplus extra
1cupunsweetened rice milk
Instructions
Night Before
heat rice milk in a small saucepan until it gets bubbly
add butter to the milk and melt it
remove from heat and let cool until lukewarm
dissolve the yeast into milk and let sit for 10 min
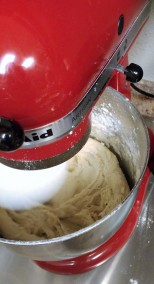
in a stand mixer, combine milk mixture, egg substitute, gluten free flour, and salt
Once the dough has come together, turn out on a well floured cutting board and kneed in some extra flour until the dough is no longer sticky
Cover the dough with a damp towel and place it in a warm place for about an hour
Once the dough has risen, pat it down, and roll it out into a flat sheet (should be thin enough to roll, but not so thin that it falls apart)
brush the now flat pastry sheet with melted butter substitute and sprinkle brown sugar, cinnamon, and nutmeg on top
roll lengthwise into a big, long tube
cut into cinnamon rolls and place into a greased 13x9 baking pan
cover with plastic wrap and place in refrigerator over night (at least 6 hours)
Morning Of
take rolls out of the refrigerator and let them sit out while you preheat an oven to 375F
bake cinnamon rolls for 25-30 min or until golden brown
turn them over and dump them out of the pan as soon as possible so that all of the left over filling will run down onto the top of your rolls instead of making them carmelize into the pan
optional icing
whisk together equal parts powdered sugar and rice milk, then add more powdered sugar as needed until icing is desired consistency
Recipe Notes
**rice milk takes longer than cows milk to bubble
**cracks will definitely happen because of all of the substitutions that you are using, don't worry the filling will fill them and you can smoosh the dough together as needed
**take the rolls out of the pan immediately unless you want to scrape the bottom half of the rolls out of the pan for half an hour
Items you’ll need:
4 cups gluten free 1:1 flour
1/2 cup sugar
2 1/4 tsp yeast
(or one package)
5 1/2 tbs butter substitute
1 cup rice milk
almond and soy work just as well, although they will leave a slight nutty aftertaste
1 tsp salt
equivalent of 3 eggs worth of egg substitute
if using the powder type of substitute, reconstitute it first
1 cup brown sugar
1 tablespoon cinnamon
1/2 tablespoon nutmeg (optional)
melted butter to cover dough (optional)
if making icing
1 cup powdered sugar
1 cup rice milk
Process- Night Before:
(1) Heat rice milk in a small saucepan until it gets bubbly (keep in mind that because it is not dairy milk it will take longer than you think it will)
(2) Add butter to the milk and melt it – remove from heat and let it cool until lukewarm
(3) Once the milk is lukewarm, dissolve the yeast and let it sit for 10 minutes
(4) In a stand mixer, combine milk mixture, eggs, flour, and salt (hand mixing works too)
(5) Once the dough has come together, turn out on a well floured cutting board and kneed in some extra flour until the dough is no longer sticky and feels velvety
(6) Cover the dough with a damp towel and place it in a warm place for about an hour
(7) Once the dough has risen, pat it down and roll it out into a flat sheet (should be thin enough to roll, but not so thin that it falls apart)
**it is worth mentioning that because you are working with so many substitute ingredients, this dough won’t ever be perfect. you will get cracks, or lumps, or not so pretty spots, but the filling will fill these in and you can always just smoosh the dough together as you need to- please don’t spend too much time overthinking whether your dough sheet is good enough: it is.
(8) Brush the now flat pastry sheet with melted butter substitute and sprinkle brown sugar, cinnamon, and nutmeg on top
(9) Roll lengthwise into a long tube
(10) cut into cinnamon rolls, and place into a greased 13 x 9 baking pan
(11) cover with plastic wrap and place in refrigerator over night
*** while this seems like a long process it really isn’t, it just takes a lot of steps to fully explain***
Process- Day of:
(1) Take rolls out of the oven and let them sit out while oven preheats to 375 degrees
(2) Bake Cinnamon rolls for 25-30 min (they’re done when they turn a nice golden brown, or your kids magically arrive at the table thanks to the smell- whichever comes first)
(3) turn them over and dump them out of the pan as soon as possible so that all of the left over inside filling will run down onto the top of your rolls instead of making them caramelize onto the pan (trust me on this one)
Optional Icing:
Honestly, these cinnamon rolls often times are just the right amount of sweet for me without doing anything else to them; however according to my 3 year old everything is better with icing. So for all of the extra sweet lovers in your life whisk together an equal amount of rice milk and powdered sugar, then add extra powdered sugar until the glaze becomes a consistency that is thick enough to stay on the rolls, but thin enough to spread.
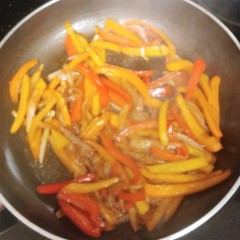
This is one of those recipes that can be anything you want it to be. Often times we use it as a side dish or a quick lunch, but with marinated steak or chicken, it can easily be a main dish. Prep time included, it takes about 15 minutes start to finish and is perfect for days when you’re low on time with hungry kids.
What you’ll need:
8 oz broccoli
6 servings of white or brown rice
1 white onion sliced
3 bell peppers sliced
any colors work
2 tbs sesame oil
enough coconut oil to coat bottom of your pan
2 tbs worcestershire sauce
Process:
(1) saute onion in coconut and sesame oil until it becomes transluscent
(2) add in bell peppers and worcestershire- saute until desired consistency
(3) while the peppers are finishing, cook rice and broccoli
(4) drain oil from peppers and onions, and combine with rice and broccoli
this is a side dish of stir fried peppers without the use of any soy based products. if marinated meat is added, this recipe can easily be turned into a main dish
Course
Side Dish
Cuisine
Chinese
Prep Time15minutes
Cook Time10minutes
Total Time25minutes
Servings4
Calories180kcal
AuthorAllergyFriendlyFamily.com
Ingredients
8ozbroccoli
6cupswhite or brown rice
1 white onion sliced
3bell peppers, slicedany colors work
2tbspsesame oil
1tbspolive oil
2 tbspworcestershire saucecheck labels
Instructions
sauté onion in olive oil (or coconut oil) and sesame oil until it becomes translucent
add in bell peppers and Worcestershire
sauté until desired consistency
while peppers are cooking, cool rice and broccoli
drain oil from peppers and onions, and combine with rice and broccoli
Recipe Notes
check the labels on Worcestershire sauce as some do have soy in them.
add in marinated chicken or steak to make a main course
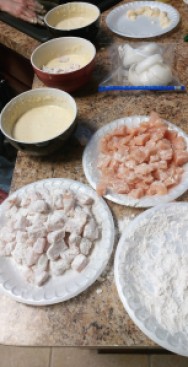
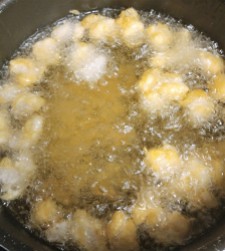
When it comes to recipes, I think an all purpose batter is one of those staples that everyone should have. The prep work for this batter is a little extensive, but it is worth it; and, if your kids are anything like mine, they will love to get messy and help. With just a few tweaks in spices, this recipe can cover anything from chicken, to onions, to fried pastries. As an example, I will post instructions for chicken nuggets that have earned the label “puffy chicken” from my 3 year old, but I haven’t found anything yet that this batter doesn’t work for.
A light and airy batter that works within the confines of allergy restrictions? It can be done.
This is an all purpose beer batter that is gluten free and allergy friendly. It can be used on anything from chicken to onions. Chicken is shown here for example
Course
Main Course
Cuisine
American
Prep Time15minutes
Cook Time15minutes
Total Time30minutes
Servings10people
Calories280kcal
AuthorAllergenFriendlyFamily.com
Ingredients
Batter
3cupsgluten free flour1:1 works best here
2 2/3cupsgluten free beercheck labels
4eggs worthegg substitutereconstitute if using powder
6 tspbaking powder
chicken
5lbschicken breastsboneless, skinless, trimmed
2cupsgluten free flourfor dredging
2tspsalt(optional)
2tsppepper(optional)
2tspgarlic powder(optional)
2tsponion powder(optional)
2tspchipotle chili powder(optional)
4cupspreferred frying oilpeanut and coconut both work well
Instructions
For Batter
whisk together beer, flour substitute, egg substitute, and baking powder until a batter forms.
for Chicken
cut and trim chicken into bite sized pieces
mix spices into extra flour
dredge chicken bites in flour
dip dredged chicken in batter
heat oil until it sizzles
drop chicken bites in oil and fry until golden brown
Recipe Notes
because you are working with gluten free flour and gluten free beer you may have to add more of one or the other to get the proper consistency- add until you get a batter that is basically the same thickness as cake batter
Items you’ll need:
3 cups gluten free 1:1 flour
plus extra to dredge chicken
2 2/3 cup gluten free beer
equivalent of 4 eggs worth of egg substitute
any brand works fine
6 tsp baking powder
5 lbs chicken breasts
preferred spices
we use salt, pepper, garlic powder, onion powder, and chipotle powder
preferred frying oil
peanut oil and coconut oil both work well
make sure you have enough to fry in whatever pan you are using
Process:
(1) cut and trim chicken into bite sized pieces
(2) whisk together beer, flour substitute, egg substitute, and baking powder until a batter forms. Because you are using gluten free flour substitute, you may have to add a little bit of extra beer or flour to get the right consistency- you are looking for the same consistency as a typical cake batter.
(3) dredge chicken bites in flour
(4) dip in batter
(5) Heat oil until it sizzles
(6) drop chicken bites in oil and fry until golden brown
 What you’ll need:
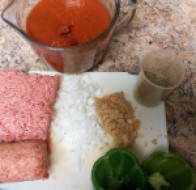 Process:
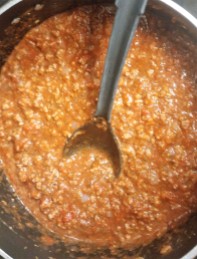 (3) Put rice into a bowl and mix in the meat sauce a little at a time until you get the desired consistency.
 (4) bake for 30 min or until brown on top.


 Items you’ll need:


 (8) If you were using the celery and onion just to flavor, go ahead and take them out now (My kids refuse to eat it if there are green things in it of course, but it tastes just as good with them left in)
 (10) Add the chicken and carrots to the broth.
 Enjoy.
 Items you’ll need:
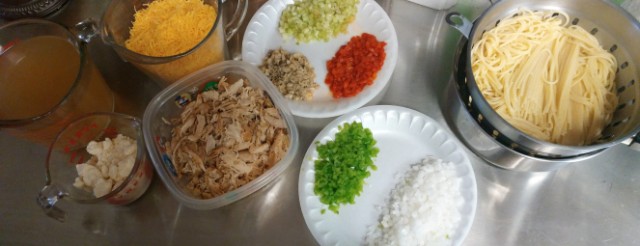


 Let cool and enjoy.

 (3) Mix in remaining ingredients. Stir until thickened.
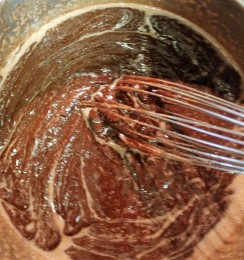
 (5) Place in fridge over night to harden. (or a couple of hours in the freezer if your kids are like mine and can’t wait that long)
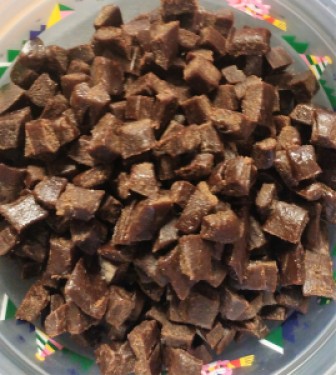


 (2) In a separate bowl, add in half of the bread crumbs, salt, pepper, and egg substitute to the onion.
 (3) Once the mixture has cooled off enough that you can work with it, add in the ground beef and mix together until it is fully blended.
 (4) Roll the meat mixture into golf ball sized balls and roll in leftover breadcrumbs. Put on pans lined in foil.
 (5) Refrigerate.